Workflows
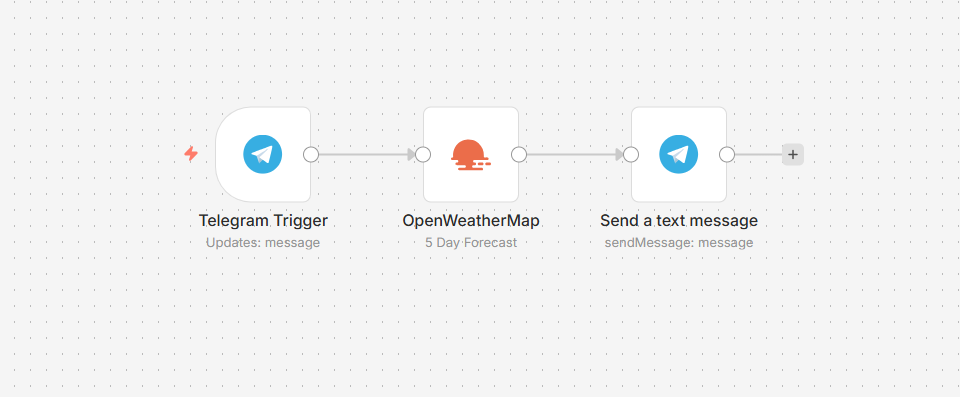
Workflows automate repetitive SOC tasks by connecting nodes that retrieve, process, and send data. A workflow runs when triggered manually or by a trigger node that monitors an external event.
The Workflows menu is visible to users with any of the listWorkflows,
viewWorkflows, or manageWorkflows permissions.
Activating a workflow
Workflows that start with a trigger or webhook node must be activated before they run. Use the Publish button in the workflow editor. Newly created workflows are inactive by default.
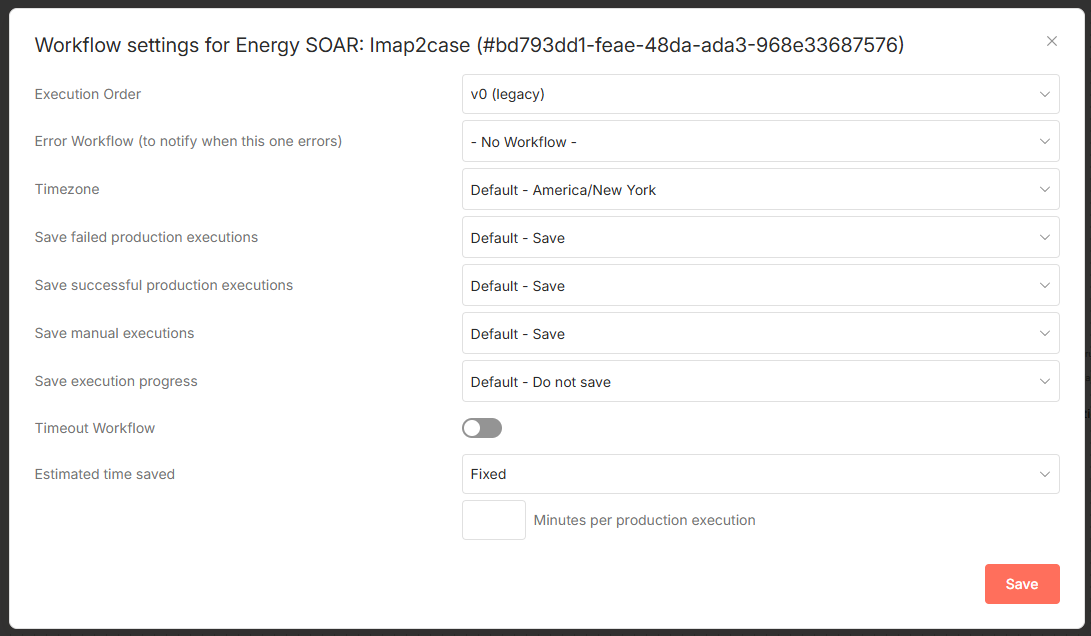
Workflow settings
Each workflow has individual settings accessible from Workflow > Settings:
Setting |
Description |
|---|---|
Execution Order |
Order in which nodes are executed when multiple branches are active. |
Error Workflow (to notify when this one errors) |
Workflow to trigger if this workflow fails. |
Timezone |
Timezone for schedule-based trigger nodes. |
Save failed production executions |
Save execution data when the workflow fails. |
Save successful production executions |
Save execution data when the workflow succeeds. |
Save manual executions |
Save executions started from the workflow UI. |
Save execution progress |
Save intermediate node results. Enables resume-on-error but increases latency. |
Timeout Workflow |
Cancel the workflow execution after the specified duration. |
Estimated time saved |
Average time this workflow saves per production execution. |
Failed workflows
To retry a failed execution:
Click the Executions tab at the top of the workflow editor.
Find the failed execution and click the retry icon in the Status column.
Choose a retry mode:
Retry with currently saved workflow — uses the latest saved version of the workflow with the original execution data.
Retry with original workflow — uses the workflow as it was at the time of the failed run.
The Error Trigger node can also be added to a separate workflow to catch and handle failures automatically.
Connections
A connection links the output of one node to the input of the next, passing data along the execution path. To create a connection, drag from the grey dot on the right side of a node to the grey dot on the left side of the target node.
A node can have multiple outgoing connections. The IF node uses two connections: one for the true branch and one for the false branch.
Nodes
Every workflow is built from nodes. There are three categories:
Core nodes
Core nodes control workflow execution or provide generic data handling: HTTP requests, webhooks, conditional logic (IF), data transformation, scheduling, and manual start.
Regular nodes
Regular nodes perform a specific action against an external service, such as reading from or writing to a third-party application.
Trigger nodes
Trigger nodes start a workflow when an event occurs. Core trigger nodes fire on a schedule or on a webhook call. App trigger nodes fire when something changes in an external service.
Node settings
Each node supports the following execution options (available by double-clicking the node):
Notes — optional label shown below the node in the workflow canvas.
Always Output Data — return an empty item if the node produces no output.
Execute Once — process only the first input item.
Retry On Fail — retry failed executions automatically.
Continue On Fail — pass input data to the next node even if this node fails.
A warning icon on the top-right corner of a node indicates a configuration error. Double-click the node to see which fields require attention.
For available integrations and built-in node reference, see the Workflows chapter.