Administration
Profiles
A profile is a named set of permissions. Each user is assigned a profile per organisation. The same user can hold different profiles in different organisations.
There are two profile types:
Administration profiles — control access to platform-wide objects (organisations, users, custom fields, taxonomies). Effective only in the
adminorganisation.Organisation profiles — control access to cases, alerts, observables, tasks, and other organisation-level objects.
Profiles are managed at Admin > Profiles and require the manageProfile permission.
Default profiles
Energy SOAR ships with four built-in profiles:
Profile |
Description |
|---|---|
|
Manages all global objects and users. Cannot create cases. |
|
Manages cases and related objects (observables, tasks). Can share them. |
|
All permissions except those affecting global objects. |
|
No permissions. Read-only access to shared data. |
The admin and org-admin profiles are locked — they cannot be edited or deleted.
The analyst and read-only profiles can be customised and deleted.
For the full list of available permissions, see Permissions.
Creating a profile
Click Add profile, select the profile type, enter a name, and check the desired permissions. Hold Shift and click a checkbox to select a range of permissions at once.
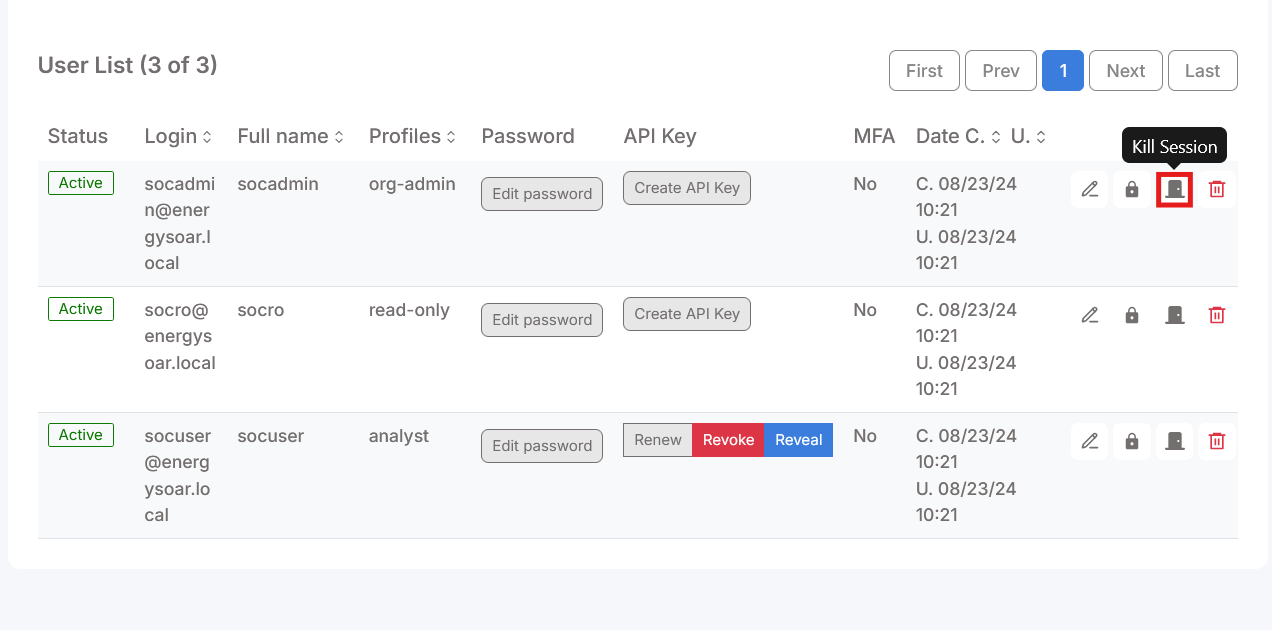
Kill user session
Administrators can terminate any active user session from the Organisations administration page. The affected user is logged out immediately.
Open Admin > Organisations and select the organisation.
Find the user in the Users tab.
Click Kill Session.

Analyzer templates
Analyzer templates control how analysis results are rendered in the UI. By default, Energy SOAR displays results using taxonomies and severity colour coding. Templates can be customised and imported.
Template management is available at Admin > Analyzer templates and requires
the manageAnalyzerTemplate permission.
Log management
Energy SOAR writes logs to /var/log/energysoar/. The following log files
are available (all with .log extension):
application— main application eventsn8n— workflow engine events
Log files rotate when they reach 10 MB. Log policy (levels, rotation, output targets)
is configured in /etc/energysoar/logback.xml.
Case custom fields
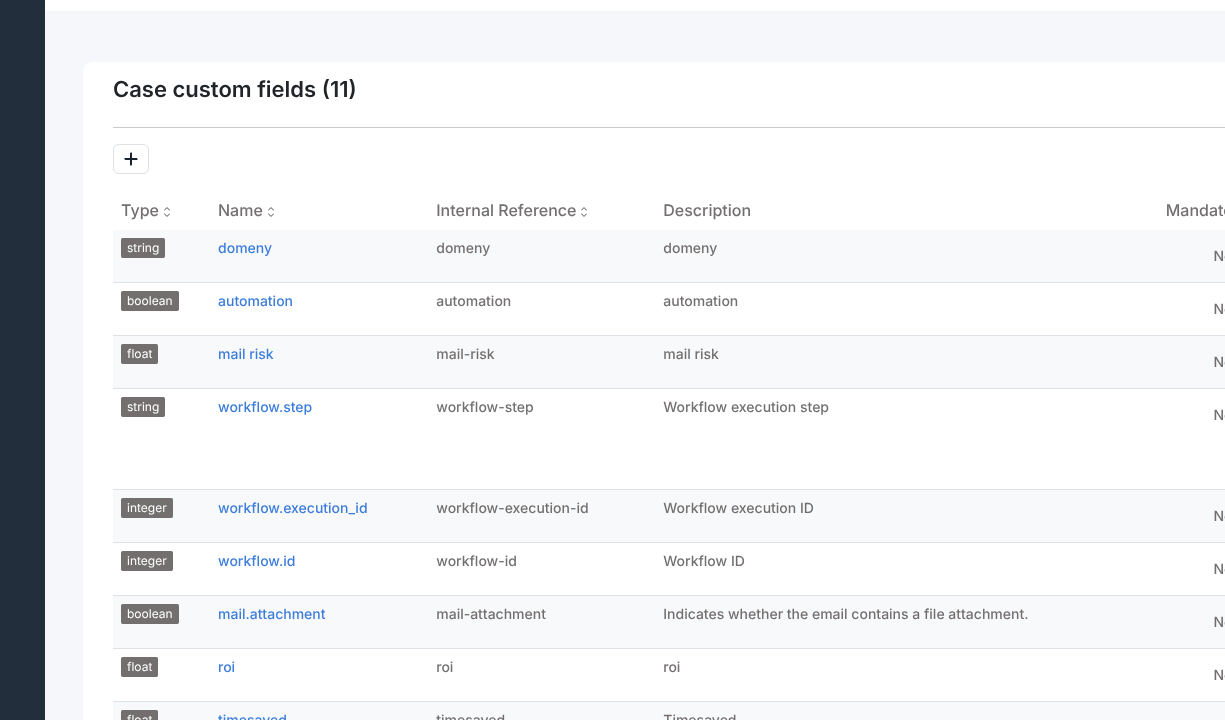
Custom fields extend cases with organisation-specific metadata beyond the built-in fields. Defined fields appear in the Additional Information section of every case.
Management is available at Admin > Case custom fields and requires the
manageCustomField permission.
Creating a custom field
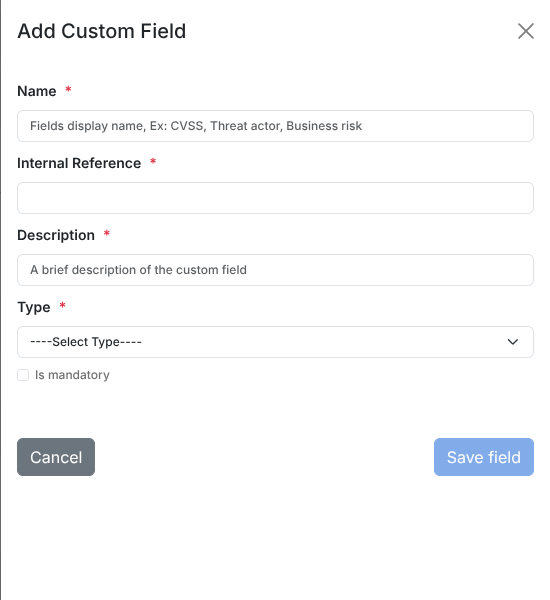
Click Add Custom Field to open the side panel. Fill in:
Name — the display label shown in cases (e.g.
CVSS,Threat actor).Internal Reference — auto-generated from the name as a lowercase hyphenated slug; used in API calls and exports. Editable before saving.
Description — a brief explanation of the field’s purpose (required).
Type — one of:
string,integer,float,boolean,date.Is mandatory — when checked, the field must be set before a case can be closed.
Possible Values — for
string,integer, andfloattypes, enter allowed values one per line. The field becomes a dropdown in cases. Leave empty to allow free-text input.
Click Save field to create the field.
Each reference must be unique. The form will warn you if a duplicate exists.
Editing and removing fields
Use the Edit Custom Field (pencil) and Remove Custom Field (bin) actions in the field list. Removing a field also removes its values from all cases.
Using custom fields in a case
Open a case and locate the Additional Information section in the case detail. Click Add next to any defined field, enter or select a value, and confirm. To remove a value, use the delete icon next to the field entry.
Observable types
Energy SOAR ships with a fixed set of observable types (ip, domain, url, hash,
and others). Additional types can be defined at Admin > Observable types.
This requires the manageObservableTemplate permission.
Click Add data type, enter the type name (e.g. asn, bitcoin-address),
and confirm. The new type becomes available in the observable type selector when
adding observables to a case.
To remove a custom type, click the delete icon in the type list. Built-in types cannot be removed.
Taxonomies
Taxonomies are structured tag libraries that follow the MISP taxonomy format. Once imported, their tags appear in the tag picker across cases, alerts, and observables.
Management is available at Admin > Taxonomies and requires the
manageTaxonomy permission.
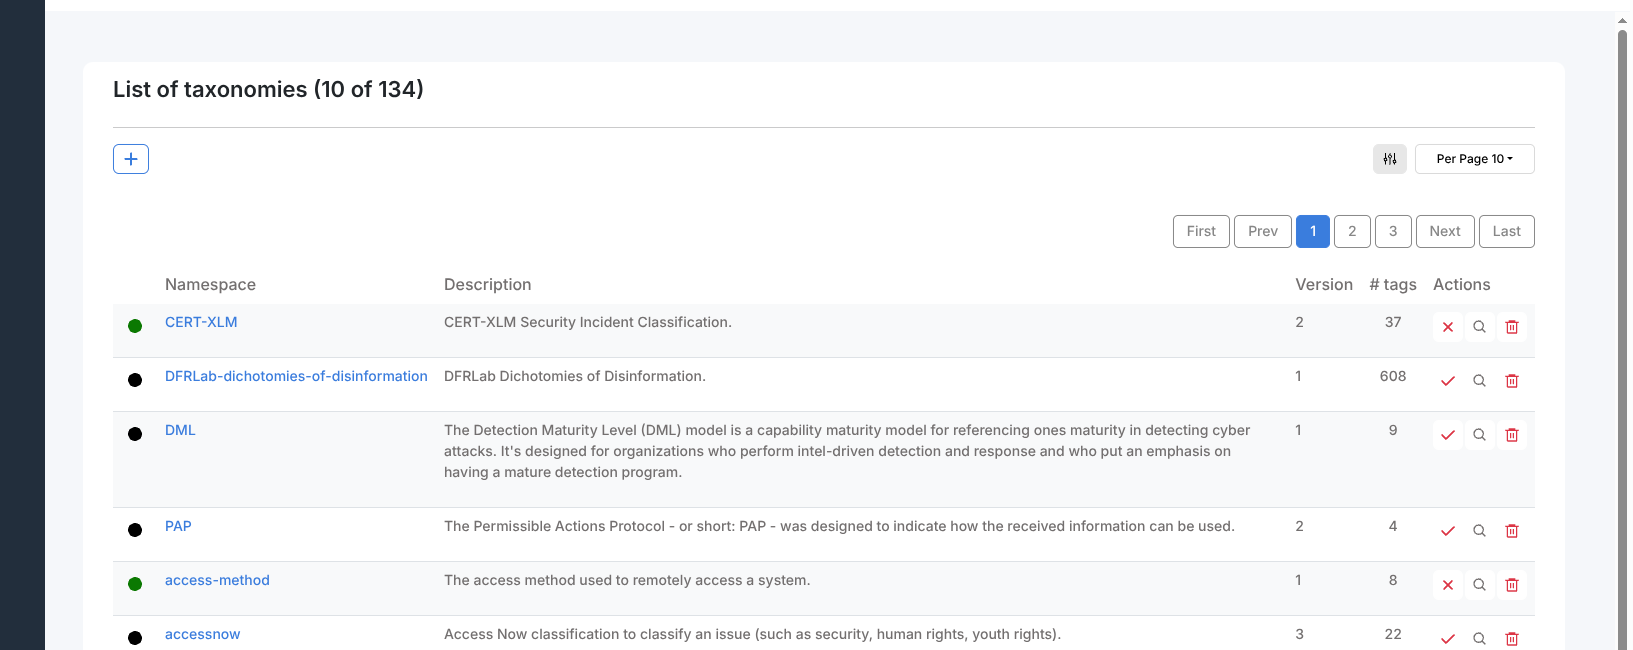
Importing a taxonomy archive
Click Import taxonomies archive to open the import panel. The archive must be
a valid ZIP file containing at least one machinetag.json file.
The official MISP taxonomy archive is available from the MISP project website. Download the archive and upload it using the Taxonomies Archive file input.
Each imported taxonomy appears in the list with columns: an enable/disable indicator (green dot = enabled, black dot = disabled), Namespace, Description, Version, # tags, and Actions.
Actions per row:
Enable / Disable (checkmark or X icon) — toggles whether the taxonomy’s tags appear in the tag picker. Disabling does not remove existing assignments.
Preview (magnifying glass) — opens the taxonomy detail with all predicates and tags.
Remove taxonomy (bin) — permanently removes the taxonomy.
To remove a taxonomy entirely, use the bin action in the row.
ATT&CK Patterns
Energy SOAR uses MITRE ATT&CK techniques as the underlying data for the TTPs tab in cases. The pattern library must be imported before analysts can tag cases with tactics and techniques.
Management is available at Admin > ATT&CK Patterns and requires the
managePattern permission.
Importing the pattern library
Click Import MITRE ATT&CK patterns to open the import panel. Download the
official MITRE ATT&CK Enterprise library (enterprise-attack.json) from the
MITRE CTI repository, then upload it using the file drop area.
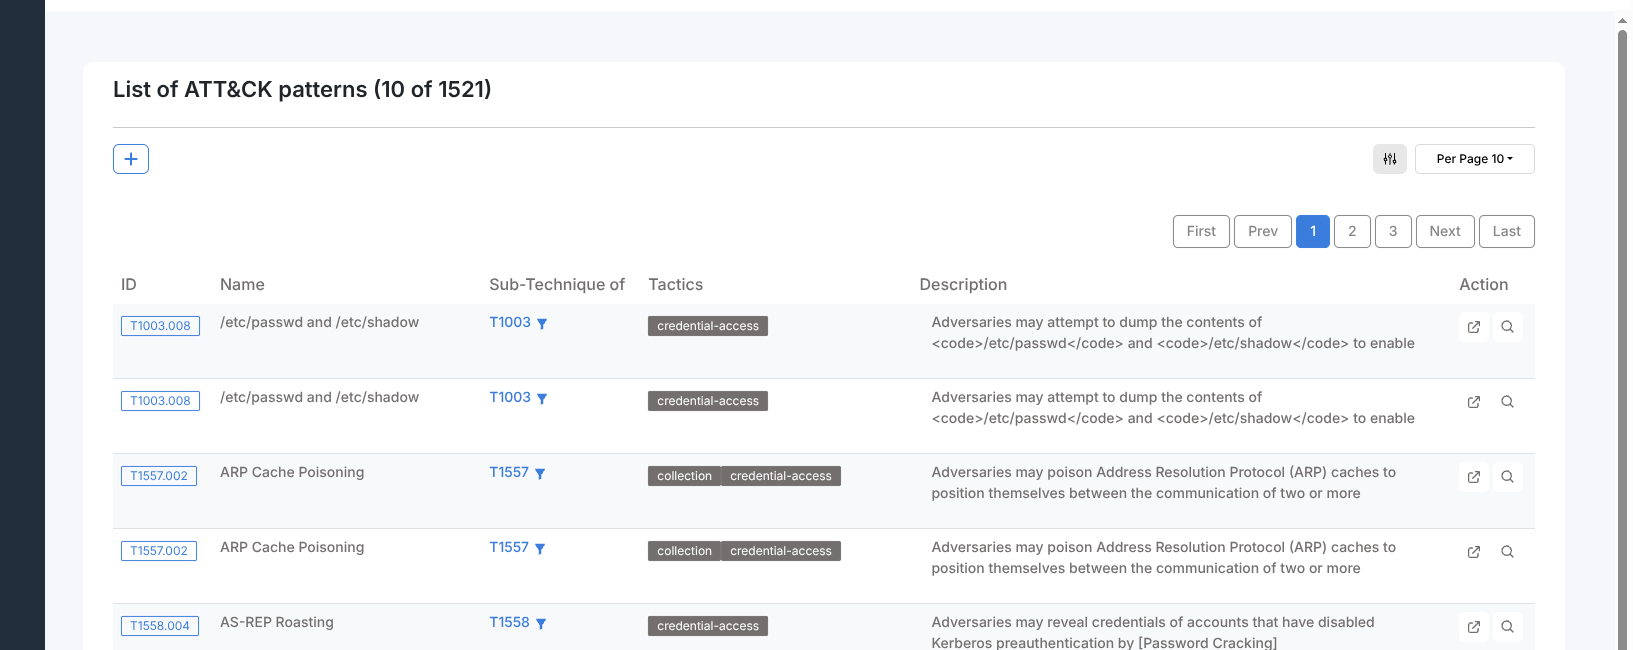
Click Import to load the patterns. The import replaces the existing pattern library. Imported patterns appear in the list with columns: ID (ATT&CK technique ID such as T1003.008), Name, Sub-Technique of (parent technique ID, for sub-techniques), Tactics (one or more tactic badges), Description, and Action (external link and preview icons).
Individual patterns can be removed by opening the pattern preview and using the remove action.
Platform Status
The Platform Status page is available at Admin > Platform Status and
requires the managePlatform permission. It provides three diagnostic views.
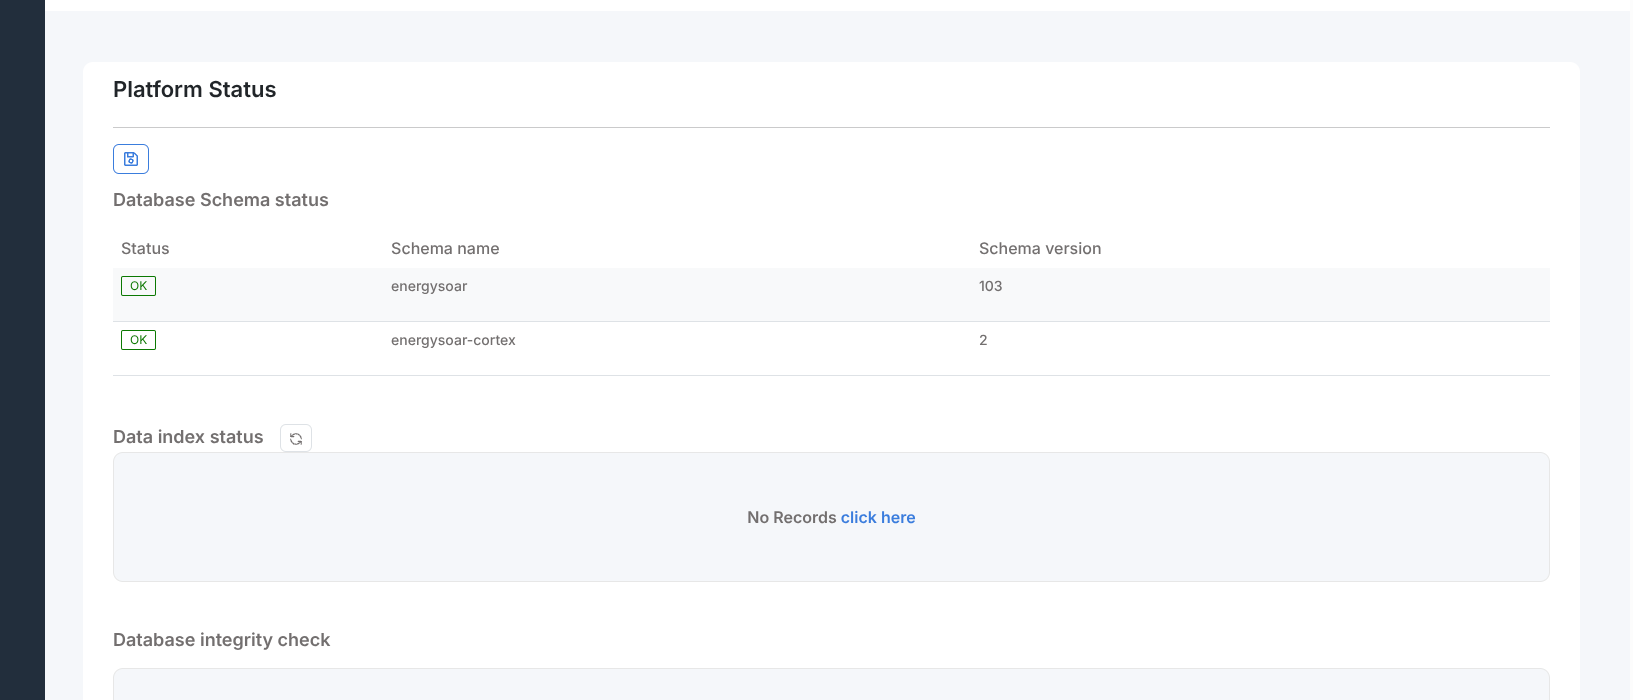
Database Schema Status
A table showing each database schema module with its current version and a status badge (OK in green or ERROR in red). An error here indicates a failed or incomplete schema migration.
Data Index Status
A table showing the Elasticsearch index name and the entity count for each
indexed type. Two maintenance actions are available (require manageAction
permission):
Reindex (cog icon) — re-synchronises the index with the database.
Rebuild index (red bin icon) — drops and rebuilds the index from scratch. Use only when reindex fails to resolve inconsistencies.
Database Integrity Check
Runs a consistency check between the database and the search index and reports any discrepancies found.